In just over a week we have a photoshoot coming up at the studio. To get the most of your time in front of the camera, use the following tips to plan.
Warm-up! Arrive early and warm-up. Don’t show up at your slotted time and need to stretch or get sweaty to stick. Make sure to be READY TO GO by your slotted time. Hair, make-up, costume and body all should be set at your designated time. Give yourself MORE time, not less to be ready.
Have written down what you intend to do. In general you will have 4 passes on a pole for pictures. Two on the white background and two on the black. For this photoshoot, you may want to consider having two lists of moves and doing them on both color backdrops. Up to you if you want the more pose options or different background options in the same poses, but that is something to think about and plan ahead of time.
You will do one group of pole moves, then have a rest while another student goes. Then you’ll do another grouping of moves. You’ll do this 4ish times alternating between backdrops. Decided what order you need to do which tricks based on your body; do you need to do your harder tricks on the first pass or the last pass?
How you group your moves is going to help you conserve energy. What leads from one thing into the next that you want do? For example, if you want to do a fireman climb and an embrace, link them together so you don’t expend the energy climbing back up after descending from the fireman climb. The more you limit climbing and string things together in an efficient way the more poses and better pictures you will get. PLAN THIS. Go to practice this weekend and have the instructor at practice help you make these groups of moves!!! A good grouping of moves is like 4-6 poses that lead to each other, show two hands and two feet from an angle and you can hold. The less time you spend in transitions, the more energy for holding moves.
Your group of moves should include your favorites. Poses you LOVE. I do not recommended doing a trick you just learned or the hardest tricks you know. Usually these look “hard” in the photo and like you’re “trying”. The best photos are of the moves that you can do easily and enjoy.
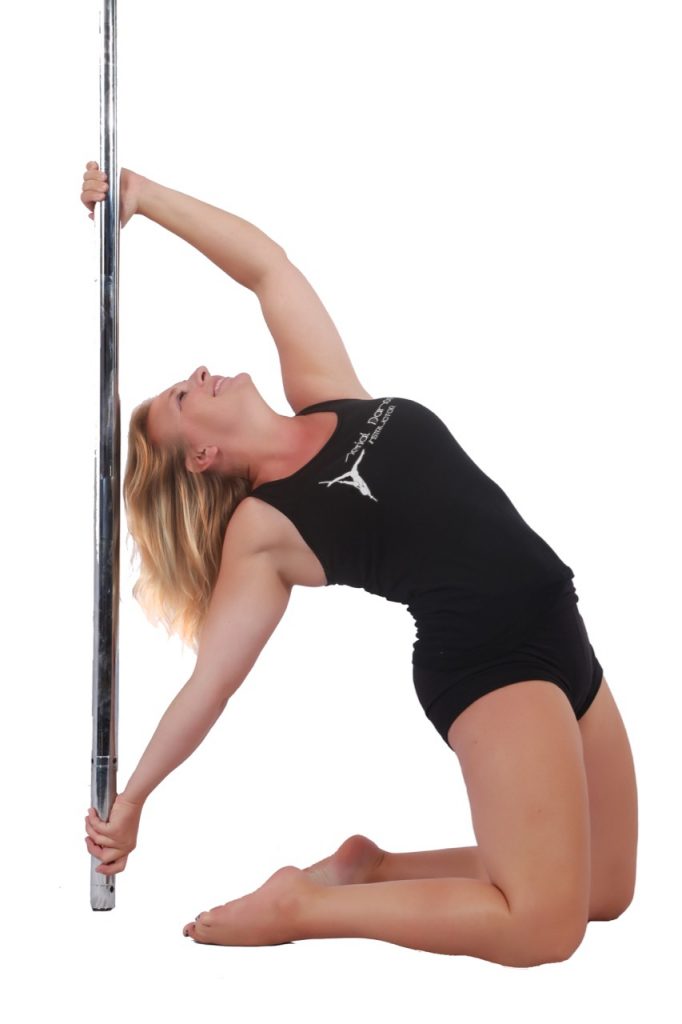
Don’t forget FLOOR POSES. At the end (and possible start) of each group of moves, do a pretty pose on the floor. Pole is so much more than hard tricks. Don’t forget to just do pretty! Play in the mirror in practice. What feels good in your body that shows two hands and two feet?
HOLD AND BREATH. In each of your moves you will need to hold them for 1-3 pole revolutions. This means squeeze, smile, and hold and hold and hold. The longer you hold the move the more likely the picture will turn out. Holding will also give your helper, ME, time to move and position you for the optimal angle. Yes, spinning is helpful but sometimes it is even better to stop the spin and pick the angle we want; the longer you can hold the more likely that this can happen. Yes, you can come down if you need to because SAFETY FIRST. But the more time you go up and down the more tired you’ll be so holding is better than climbing again.
Your face is part of this picture. Don’t forget to smile. Or make sexy eyes. Or whatever you want your face to be….just remember it needs to be something! So practice faces in the mirror at practice too!
If you aren’t getting a move that day, don’t worry. Just move on! The great thing about the camera is it can capture a millisecond of a move and make it look like you got it. Or that just won’t be one of the images you go with, and that is ok too! There will be other photoshoots for that move. You will have a LOT more poses and pictures to choose from than you expect.
The more you plan before going into the photoshoot….the more pictures you’ll have to choose from too. So take time this week to plan your groups of moves and the order you want to do them! I can’t wait to help you get awesome images at the shoot.